EX2210-T0 Quick Start Guide
EX2210-T0 Dual-Band Wireless AX1800 Gigabit Ethernet Gateway
Package Contents
- Device
- Power Cable
- Ethernet Cable
- Quick Start Guide
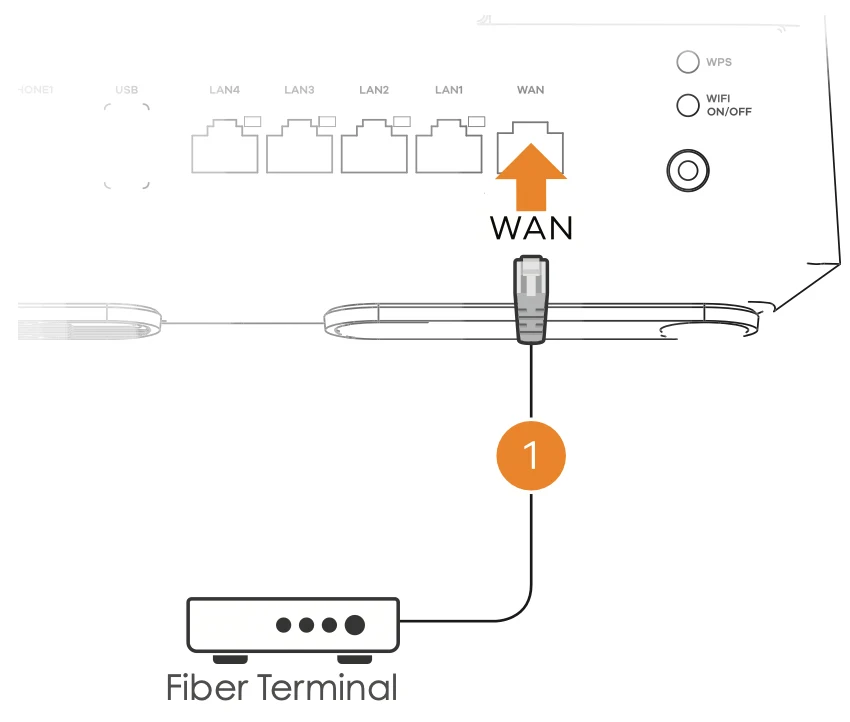
Step 1 - Hardware Connections
- Using the provided ethernet cable, connect the fiber terminal to the WAN port on back of the EX2210-T0
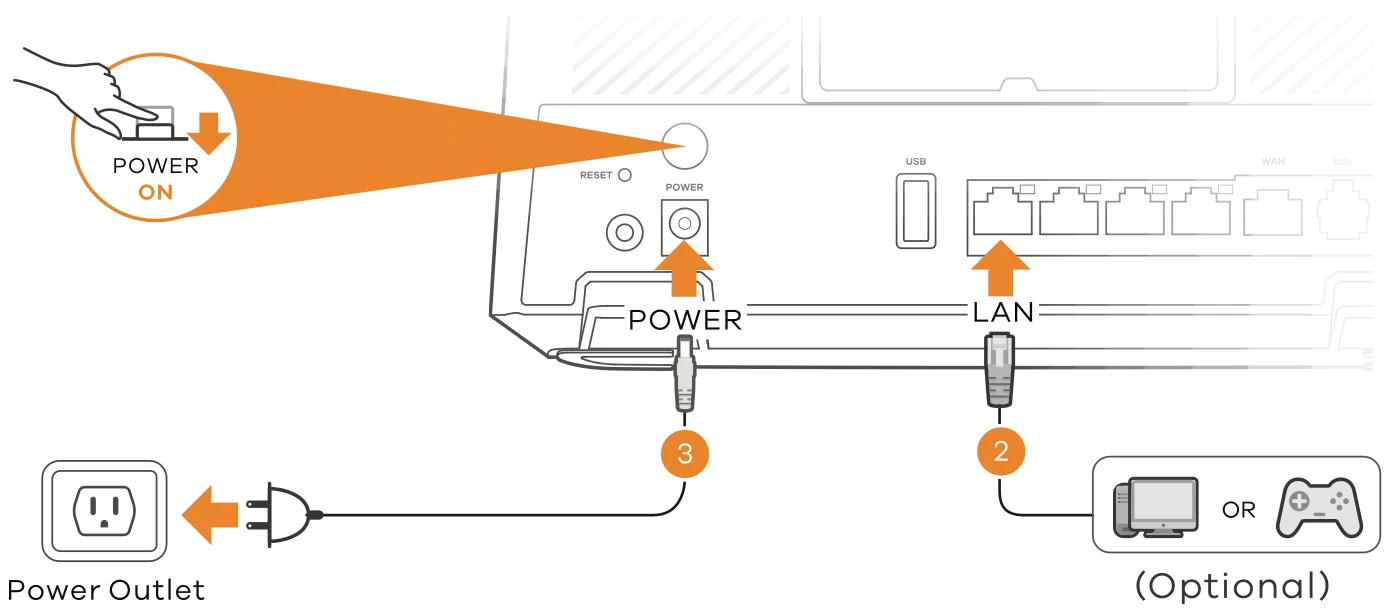
- Connect other devices, such as gaming consoles or computers, to any available LAN ports using an ethernet cable (optional).
- Connect the power cable to the power port on the EX2210-T0 and plug it into a nearby power outlet. Turn on the power by pressing down on the power button.
Status Indicators
|
Internet
|
| Solid Green |
| Blinking Green |
| Red |
| Off |
|
| Internet is ready |
| Transmitting/receiving internet data |
| Attempted to get an IP address but failed |
| Internet is not ready |
|
|
Power
|
| Solid Green |
| Blinking Green |
| Red |
| Blinking Red |
|
| Power is on |
| Starting up |
| Malfunctioning |
| Upgrade firmware |
|
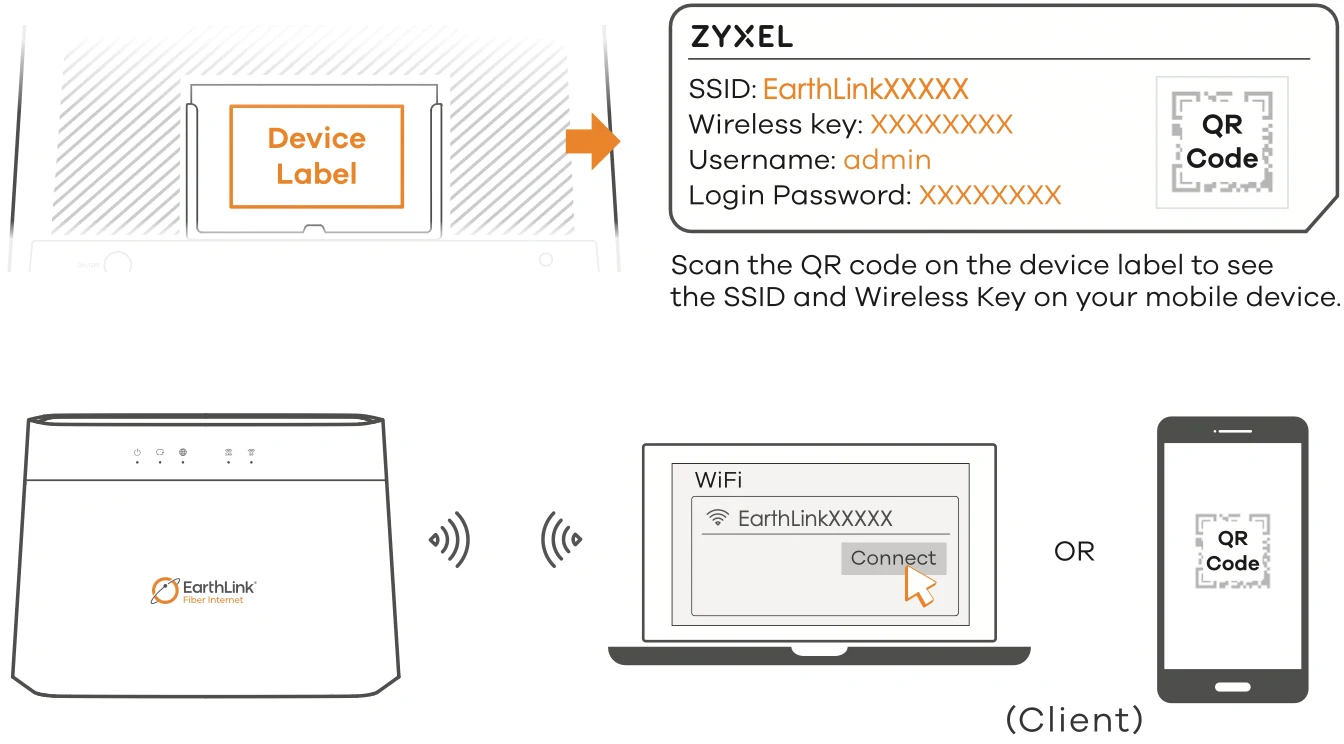
Step 2 - WiFi Connection
- A. Two options to connect via SSID
- Scan the QR code on the device label to see the SSID and Wireless key on your mobile device; or
- Use the SSID and Wireless key on the device label to connect wirelessly to the Device. On your smartphone or notebook, find this SSID. Enter the Wireless key
to connect
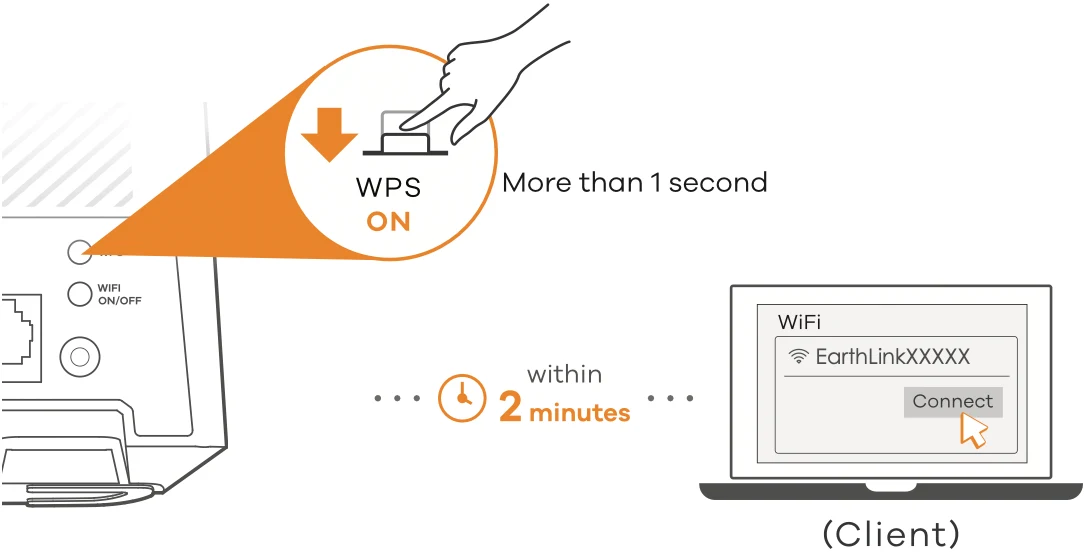
- B. Using WPS: Press the WPS button until the WiFi 2.4G and 5G LEDs light up in amber. Press the WPS button on the client. If the WPS method fails, use SSID and Wireless key to set up a Wifi connection (4A above)
|
2.4G
|
| Blinking Amber |
| Solid Green |
| Blinking Green |
|
| The device is connecting to 2.4 GHz Wifi via WPS |
| 2.4 GHz Wifi is ready |
| Transmitting/receiving data |
|
|
5G
|
| Blinking Amber |
| Solid Green |
| Blinking Green |
|
| The device is connecting to 5 GHz Wifi via WPS |
| 5 GHz Wifi is ready |
| Transmitting/receiving data |
|
Step 3 - Quick Start Wizard
- Open a web browser and put http://192.168.1.1 in the address bar and press Return/Enter. Enter the default User name (admin) and admin Login Password (on the device label) and click Login. The Wizard will run. Follow the Wizard's prompts to complete the setup.
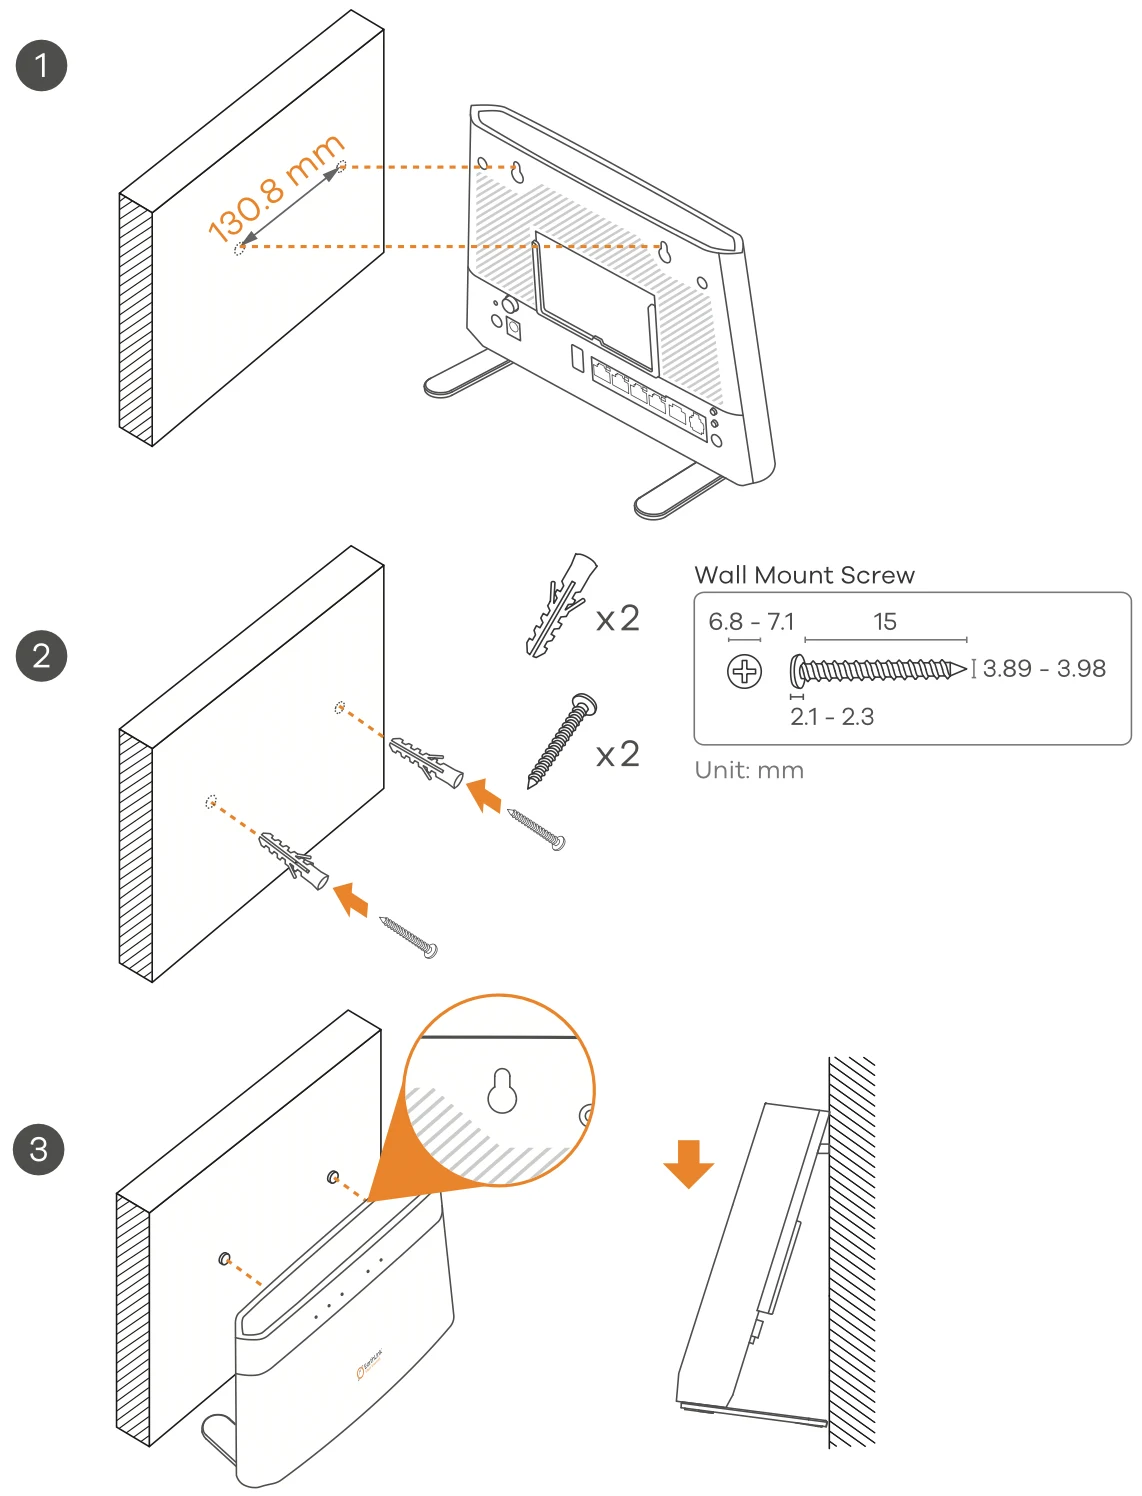
Wall Mounting (Optional)
- Drill two holes on the wall at the distance of 130.8mm (approximately 5.15 inches)
- Insert screw anchors and screws (not provided) into the holes
- Place the Device so the wall mount holes line up with the screws. Slide the Device down gently to fix it into place.
Related Articles
Axon EL4000 Quick Start Guide
Axon EL4000 Specifications 7.4" L x 7" H x 1.65" W 2 lbs. Operating Environment: 0° C to 40° C | 32° F to 104° F 10% to 90% Humidity (non-condensing) Storage Environment: -20° C to 85° C | -4° F to 185° F 10% to 90% Humidity (non-condensing) Getting ...
Titan 3000 Quick Start Guide
Titan 3000 What’s Included Device x 1 Power Adapter x 1 Ethernet Cable x 1 Quick Start Guide x 1 Device External Interface Environmental Specification Feature Specs Feature Specs Operating temperature 0⁰F to 115⁰F Operating humidity 0 to 95% Storage ...
EL5000 (D60 5G) Quick Start Guide
EL5000 (D60 5G) Specifications 8.23" L x 7.99" H x 4.53" W | 2.57 lbs. Operating Environment -10°C to 45°C | 14°F to 113°F | 5 to 95% Humidity (non-condensing) Storage Environment -40°C to 70°C | -40°F to 158°F | 5 to 95% Humidity (non-condensing) ...
Zyxel P-660R-D1 - Change Saved Password
Follow the instructions below to replace the saved password for your EarthLink e-mail address with your new password. How to Change Your Saved Password in Zyxel P-660R-D1 Modem 1 Open your web browser and go to http://192.168.1.1. NOTE: If the login ...
Hyper - Installation Complete
Spanish ¡Felicitaciones! ¡Prepárese para la velocidad! Se ha finalizado su nueva instalación de HyperLink por EarthLink. Si desea obtener ayuda adicional, responda a este mensaje o llámenos al 888-327-8454. Envíe "STOP" para cancelar la suscripción. ...